B-field of Current


B-Field of Current demo picture

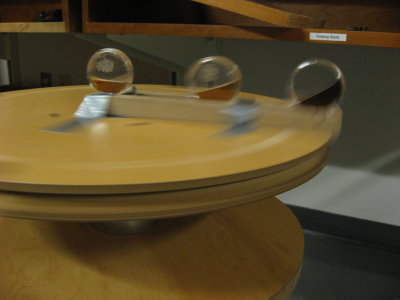
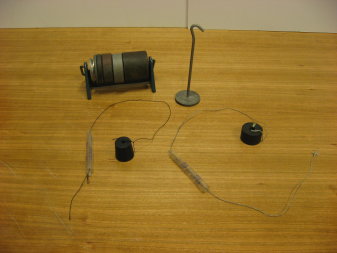
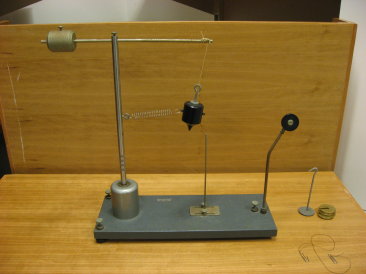
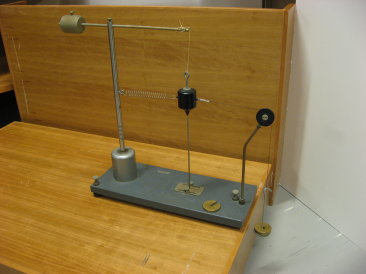
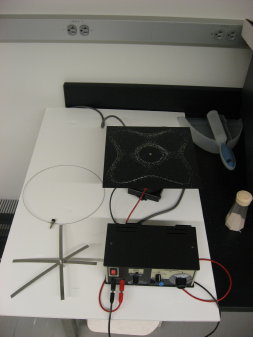
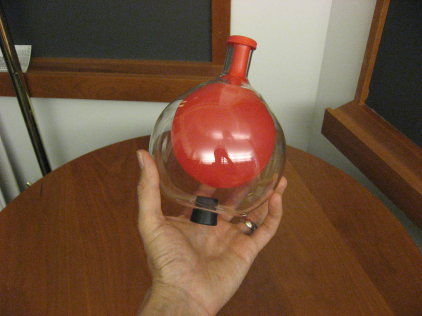
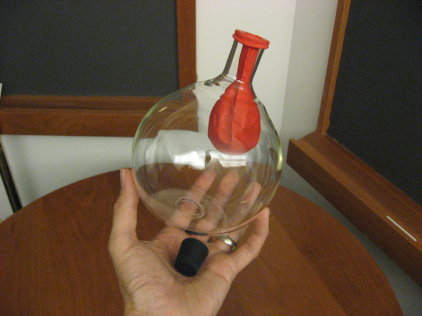
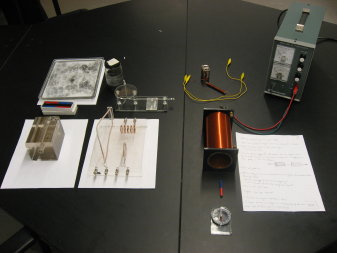
  • Purpose: Illustrate shape of B-field around current carrying
    wires and show similarities to B-field produced by permanent magnets.

Location

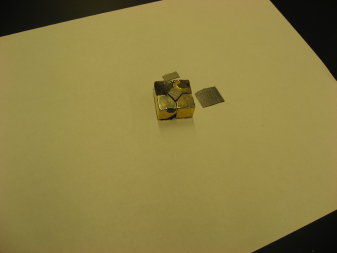
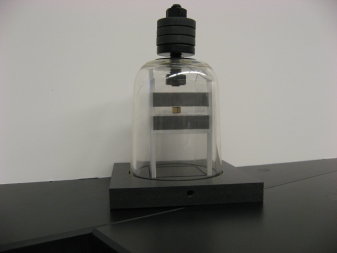
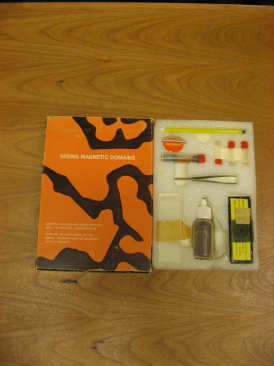
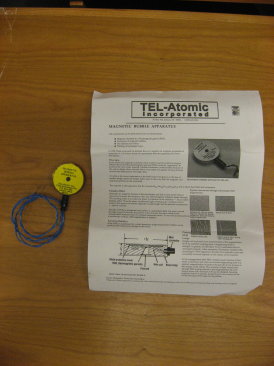
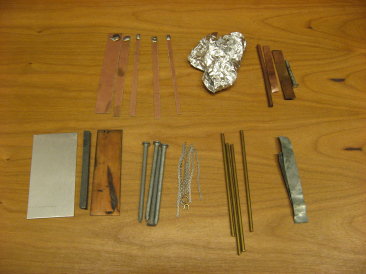
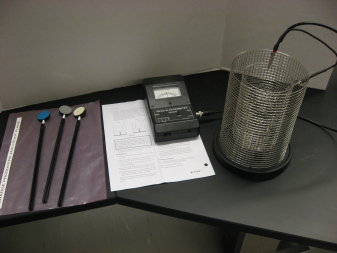
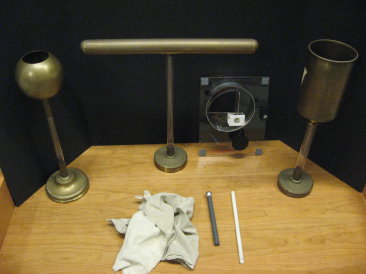
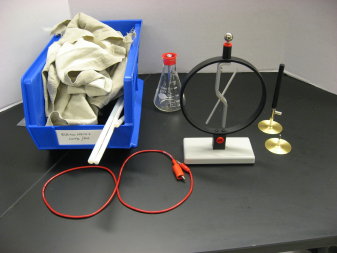
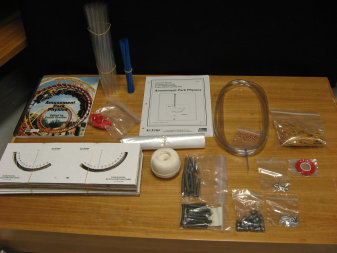
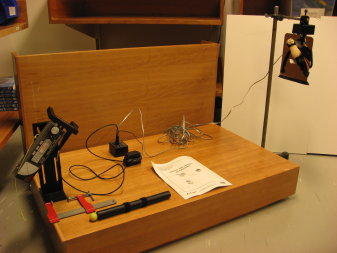
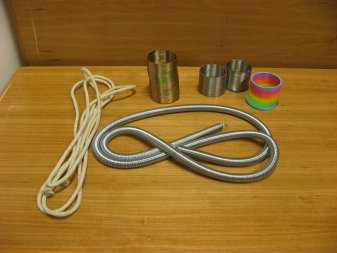
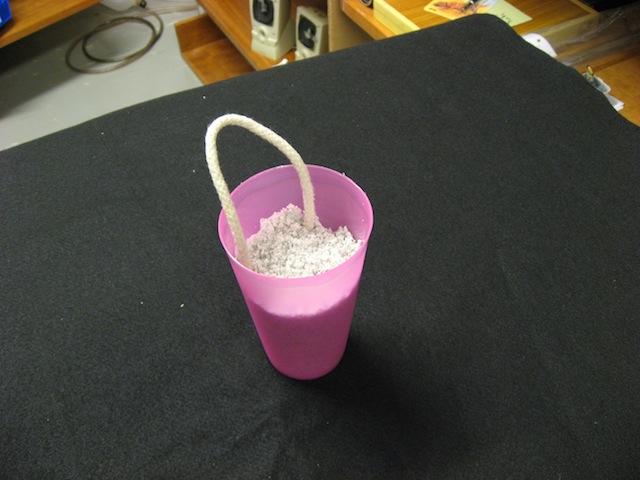
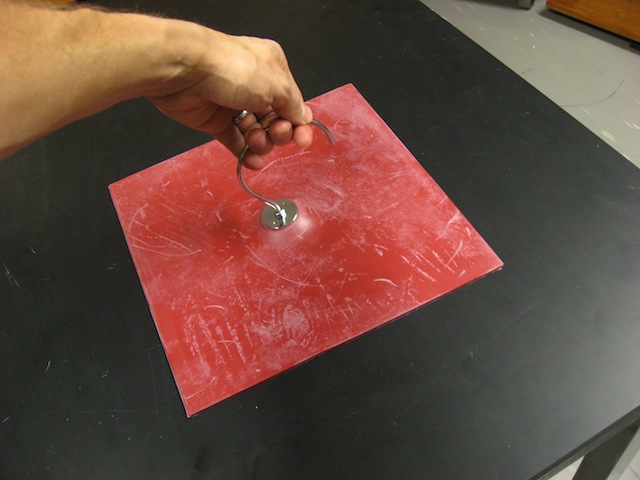
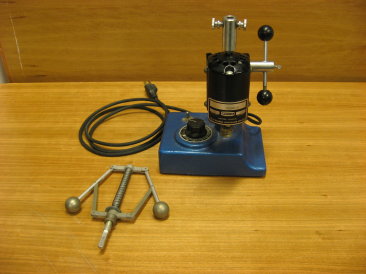
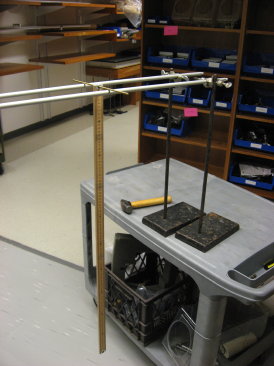
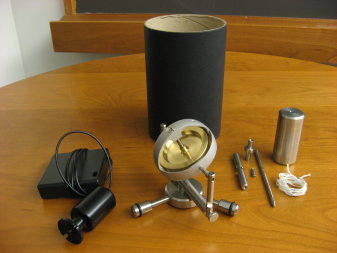
  • Field demonstrators, iron filings, solenoid, perm. magnets,
    mini-compass: L01-section B2
  • Power supply: L35-section F1


Paramagnetism of LOx

Paramagnetism of LOx demo picture

Paramagnetism of LOx demo picture 2

Paramagnetism of LOx demo picture 3

  • This demo works best with small groups as the effect is short lived and visible only at close range.
  • Wear cryo gloves at all times during the performance of this
    demo.
  • Fill small styrofoam cooler (top photo) with liquid nitrogen to a depth of 5 or 6 inches. Submerge magnet in LN2 to cool down. When magnet reaches temperature of LN2, boiling becomes less rapid (may take 2 or 3 minutes). If magnet is not sufficiently cold, LOx will evaporate before suspension can be observed.
  • Using a paper cup, remove some LN2 from styrofoam cooler and pour into suspended can. Liquid oxygen will condense on surface of can and drip into magnet’s variable gap.

Location

  • Aluminum can, clamp, and magnet located in L01, section B2.
    Styrofoam cooler and ring stand in L34.
  • 5G30.20

Video resources:

Energy Ball


Energy ball demo photo

Energy ball demo photo 2

Touching both electrodes at the same time completes the circuit and causes the ball to light up. If one person touches one electrode and another person touches the other the ball will not light up; but if the two people then touch each other the ball will light up. A circuit chain consisting of multiple students can be created.

  • Located in L01, section B-4.


Human Battery


Human Battery demo photo
Human Battery demo photo 2

  • A copper sheet electrode and an aluminum sheet electrode
    are connected to a voltmeter. Place a hand on each electrode and observe the
    voltage ( you are the electrolyte).
  • Located in L01, section B3. Voltmeter and cables in L35.


Lemon Battery


Lemon Battery demo photo
Lemon Battery demo photo 2

  • Insert a copper and a zinc electrode into lemon; connect electrodes to multimeter. Experiment with different electrodes.
  • Electrodes located in L01, section B3; multimeter in section
    A1.


Force on Capacitor Plates


cap1

capacitor 2

  • When Capacitor is charged, plates experience an attractive force.
  • Force can be measured by placing one plate on a tripple beam balance, and suspending the other plate directly above the first using a ring stand.
  • Capacitor plates are connected to high voltage power supply.
  • Compare measured force to theoretical.

Location

  • Balance: L35, section D3
  • High Voltage Power Supply: L01, section A1
  • Capacitor plates with electrodes: L35 section E2
  • Lab Jack: L35, section D1


Force on Dielectric


Force on Dielectric demo photo

  • When capacitor is charged by Wimshurst generator, dielectric plate experiences a force, pulling plate into capacitor.

Location

  • Capacitor, dielectric plate, and balance arm: L01, section B1.
  • Wimshurst generator: L01, Section A2.


Energy in Capacitor


Energy in Capacitor demo photo

  • Purpose: Compare the energy stored in a capacitor to the
    potential energy of an object raised vertically by the electrical discharge
    of the capacitor; measure the efficiency of a motor.
  • Located in L01, section B1.


Capacitor Discharge


Capacitor Discharge demo photo

Connect the capacitor to one of the HP power supplies located in L35. Charge the capacitor to 100-140 V (the more V the louder the bang).After the capacitor is fully charged, disconnect it from the power supply(or, if using a switch to charge up capacitor, flip switch to “discharge”).Finally, short the capacitor leads with the metal part of the screw driver. A loud bang and bright spark will imediately ensue.

  • Located in L01, section A2


Leyden Jar


Leyden Jar demo photo

  • Purpose: Illustrate principles of capacitance.
  • Use Wimshurst generator to charge inner canister. Discharge
    using long screwdriver, or other insulated conductive device (not your fingers, i.e. don’t touch inner and outer canisters simultaneously).
  • Located in L01, section A2


Faraday Cage


Faraday Cage demo picture

  • Use the cage in conjunction with Van de Graaff to demonstrate
    electrostatic shielding.
  • Place a hand-held radio inside the cage to demonstrate electromagnetic
    shielding (radio in cage should pick-up no signal).
  • Located in L01, section A2.


Electrophorus


Electrophorus demo picture

  • Charge the plastic electrophorus plate negative by rubbing it with fur. Placing the metallic plate on top of the plastic plate and connecting it to a grounding wire will give the metallic plate a positive charge by induction.
    Existence of these charges can be verified using the electroscope. The plastic
    plate should retain its negative charge long enough for demonstrator to charge metal plate several times.

Location

  • Electrophorus demo: L01, section A2, top shelf.
  • Electroscope: L01, section A2.


Coulomb Apparatus


Coulomb Apparatus demo picture
Coulomb Apparatus demo picture 2

  • Demonstrate 1/r^2 dependence of Coulomb force.
  • For accurate measurements, potential difference between charged
    spheres should be maintained using high-voltage power supply.
  • For less-quantitative measurement, spheres can be charged
    with rod and fur. Charge on sphere can then be measured using proof plane,
    Faraday Ice Pail, and electrometer (right).

Location

  • Coulomb Apparatus: L01, section A2.
  • Proof plane: L01, section A2, plastic bin.
  • Faraday Ice Pail: L01, A2.
  • Electrometer: L01, A1.


Charge on Conductor


Charge on Conductor demo picture

Charge on Conductor demo picture 2

  • Use rod and fur to charge conductors. To
    determine charge distribution on conductors use wand and electroscope, or
    proof plane and Faraday Ice Pail (right) with electrometer.
  • According to theory, no charge should reside
    on the inner side of a hollow conductor.

Location

  • Conductors: L01, section B1.
  • Rod and fur: L01, section A2.
  • Wand and proof plane: L01, section A2, plastic
    bin.
  • Faraday Ice Pail: L01, A2.
  • Electrometer: L01, A1.


Faraday Ice Pail


Faraday Ice Pail demo photo

  • Use the ice pail in conjunction with an electrometer (shown)
    to measure charge and potential difference. Touch the Proof Plane to the point of interest on the charged body, then place the Proof Plane inside the ice pail. The Electrometer reading will be directly proportional to the charge
    on the Proof Plane.
  • Located in L01: proof planes-section A2; electroscope- section
    A1; Ice Pail- section…


Electroscope


Electroscope demo photo 2

  • Purpose: Study the nature of electric charge in a qualitative
    fashion.
  • Charging a rod: to create a positivley charged rod rub glass with silk; to create a negatively charged rod rub teflon with fake fur (the blue stuff).
  • To determine the conductivity of an object: Charge the electroscope, then touch the electroscope top (metal sphere) with the object. If the object is an insulator the electroscope will not respond to the touch.
  • Located in L01


Charged Balloons

Charged Balloons demo photo

  • Connect balloons with long piece of string. Attach string to ring stand using a binder clip, as shown above.
  • Rub balloons with fake fur, or on your own head, and balloons will repel each other.

Location

  • Balloons: L01, section A2
  • String: L35, section B1
  • Ring stand: L35, section A4


Kelvin Water Dropper


Kelvin Water Dropper demo picture

  • Principle: Charge separation by induction.
  • Fill container with water. As water drips through copper
    rings, metal canisters become polarized (to see why, check out this link:
    Kelvin’s Thunderstorm).
    Bend copper arms so that the thin conducting wires (attached to each arm)
    are close together but not touching. After 10 or 20 seconds of drip time touch
    the two conducting wires together using a non-conducting rod (pencil), little
    light bulb should blink at the moment of contact.
  • Tricks to making it work: Make sure base is dry (to keep
    canisters electrically isolated); position copper rings at a location that
    is just below where the water stream breaks apart into droplets; hold a charged object (i.e. charged nylon rod) close to one of the copper rings as the water is dripping to get the charge separtation process started.
  • Located in L01; section A2; covered in plastic bag.


Van de Graaff Gen.


Van de Graaff Generator demo picture

  • Principle: Static electricity is cool.
  • Located in L01, section A2
  • Van de Graaf accessories are located beneath Van de Graaff
    generator in plastic containers.

Some ideas for experiments beyond the typical shock-myself-and-my-students:

  • Bend a paper clip into an L shape and tape it to the charged sphere to create
    an ion gun; point the paper clip at the palm of your hand to feel the “ion
    wind”. Point the paper clip at your shirt to charge your shirt up- after
    30 seconds shirt should begin sticking to your chest.
  • Place a cup of styrofoam peanuts, or a stack of styro or aluminum plates
    on top of the sphere, turn on generator and watch stuff fly.
  • Dim the room lights, touch one end of a fluorescent bulb to the charged
    sphere and the other end of the bulb to the small discharging sphere. Bulb
    will flicker.
  • Using a squirt gun shoot a stream of water past the charged sphere; water
    should ionize and stream will disperse.


Swinging Water Cup

Swinging Water cup demo picture

  • Demonstrate how centripetal force/acceleration keeps water
    in cup even when cup is upside down.
  • Place water cup on center of plate. Hold ropes such that
    plate is level. Swing slowly back and forth; when feeling ready, swing in
    full circle. Works very well. Practice once or twice before using in class.
  • Located in L02, section B2.


Simultaneous Drop


Simultaneous Drop demo picture
Simultaneaous Drop demo picture 2

  • Purpose: Show that an object’s acceleration, under the influence
    of gravity, is un-effected by the objects velocity.
  • Cock mechanism; place pin in hole to keep cocked; place balls
    on ends; release pin to eject balls.
  • One ball drops vertically, with zero initial velocity; other
    ball launched horizontally. Balls hit floor simultaneously.
  • Located in L02, section B3


Turntable

Turntable demo picture

  • Used in uniform circular motion lab, coeficient of static
    friction is calculated and then used to predict maximum rpm at which car will
    remain on table.
  • Adjust rpm with 5 amp, regulated DC power supply.

Location

  • Turntable and car in L02, section B4.
  • Power supply in L35, section F1.


Whirligig


Whirligig demo picture

  • Purpose: Used in Uniform Circular Motion lab to illustrate
    relationship between centripetal force and circular motion.
  • Hang weight on end of string opposite rubber stopper; twirl
    stopper just fast enough for centrifugal force to balance weight.
  • Located in L02, section B3. Slotted mass set in L03, section
    A1.


Shoot the Monkey


Shoot the Monkey Demo Picture

  • Purpose: Show that the effect of gravity on the launched
    ball’s vertical motion is equivalent to the effect of gravity on the monkey’s
    vertical motion; i.e. they fall at the same rate.
  • Here are some videos of this very demo. In Real time,  Slow-motion, and  Slow-motion face on.
  • Located in L02, section B3.

Some tips for setting up this demo in SC 199 (Cunniff):

  • Set up everything on the right side of the room (as you face the front). Clamp the target holder to the top rail of the outermost of the movable boards, about halfway across the length. (The large right angle clamp will be at an odd angle, but that’s okay. Attach the larger of the two rods to this clamp, then put the little right angle clamp about 1/2 to 2/3 of the way out on this rod.
  • Next, attach the smaller rod. And, finally, clamp the target holder to the small rod. Attach the metal target plate (w/optional monkey) to the magnetic release, and slowly raise the board as high as it will go.
  • Clamp the launcher to the front edge, right corner, of the front center table. Look through the back of the launcher to aim it. (Angle should be about 28 degrees.)
  • Remember to keep the trigger box disarmed while loading the launcher! And, of course, flip the switch to “Armed” before launching the ball!


Coriolis Gun


Coriolis Gun Demo Picture

  • When turntable is spinning, gun will miss target. When turntable
    isn’t spinning, gun will hit target.
  • Turntable located in L02, section D3; cannon and clamp located
    in L02, section B3, with “shoot the monkey” demo.
  • 1E30.20


Crossing the river

Crossing the river Demo Picture

  • Demonstrate the phenomenon of relative motion.
  • Pull a sheet of wrapping paper along the lecture bench while
    the mechanical toy car crosses the paper; or, instead of using wrapping paper,
    use the movable blackboards- cars are magnetic (as photo indicates).
  • Located in L02, section B1; wrapping paper in section B2.


Drop Time


Drop Time Demo Picture
Drop Time Demo Picture 2

  • Measure the drop time of a small plastic ball (or any object
    that isn’t so heavy that it damages the force plate upon impact).
  • The Pasco force probe is located 1 or 2 meters above the
    floor, suspended by a ring stand, oriented with the force sensor pointing
    down. A small plastic ball is pressed lightly up against the sensor and then
    released. The ball lands on the force plate, resting
    on the floor, directly beneath the force probe. The event is graphed using
    logger pro, (in the picture above, the top graph is that of the force probe,
    and the bottom the force plate). The moment of release and moment of impact are indicated on the two logger pro graphs. Time measurements are only accurate to
    .02 seconds.
  • Force probe and labpro device is located in L35, section
    B2. Force plate is located in L02 section B3.
  • Note: You might think that a photogate would
    be the more effective and convenient way to measure the release time. But
    for some reason, when the photogate is used drop times are consistently measured
    to be .04 seconds too short. Which amounts to about 10% error.


Penny & Feather


1130171259

1130171300

1130171300a


  • Show that a penny and a feather fall at the same rate in
    a vacuum. 
  • Feather tends to stick to the walls of the container (static cling). Use styrofoam pieces instead.
  • Located in L02, section B2- top shelf, in large plastic container. Pump located in L02, section D1.


Water Accelerometer


Water Accelerometer Demo Picture

  • When plastic container is moved, inclination of ping-pong
    ball indicates direction of acceleration. Use with rotating stool to demonstrate
    radially-inward direction of centripetal acceleration.
  • Located in L02, section D2.


Flame Accelerometer


Flame Accelerometer Demo Picture


  • Inclination of flame indicates direction of acceleration.
    Spinning around while holding flame results in a radially inward flame inclination.
  • Candle protrudes through card board. Light candle, then place
    glass lamp cover over candle. Place card board piece on top of lamp cover
    to shield flame from wind. If flame starts to die, remove top cover.
  • Located in L02, setcion B-1.


Resonance Tube


Resonance Tube Demo Picture

  • Purpose: Demonstrate resonance and measure speed of sound.
  • Two different resonance tubes are shown above.

For Smaller Tube

  • Strike tuning fork on rubber pad; place fork near larger
    opening of tube; slide inner tube in and out until resonance is heard. Use
    tube length and frequency to determine speed of sound.

For larger Tube

  • Use speaker and function generator to find resonant frequency
    of tube. Once resonance is found, use vernier microphone to locate nodes and
    anti-nodes.Use tube length and frequency to determine speed of sound.
  • Located in L02,


Dog Whistle


Dog Whistle Demo Picture

  • Determine the highest frequency of audible sound. Adjustable
    whistle produces mostly frequencies inaudible to us. Lowering the pitch brings
    the sound into most people’s audible range.
  • Located in L02,


Doppler Rocket


Doppler Rocket Demo Picture

Two people required to use this demo. Each person holds set of handles, and unwinds rope (about 20 m) . When one set of handles is quickly separated (handles initially held together, then quickly pulled apart) the football shaped “rocket” is forced to slide down the ropes. The rocket contains a noise maker (turned on manually) that exhibits Doppler shift when in motion. Users take turns launching and catching the rocket. Doppler affect can be heard by audience members in close proximity.

See: https://www.pasco.com/prodCatalog/WA/WA-9826_doppler-rocket/

  • Located in L02, section C2


Beats Demo

beats3

beats2

beats1

  • Listen to beat frequencies through speakers, while simultaneously seeing waves with oscilloscope. Use scope’s math function to add waves together. Resultant wave (shown in red, above) displays beats.
  • Demo consists of 2 function generators, 2 speakers, and one
    oscilloscope.
  • Located in L02, section C2; Oscilloscope located in L35,
    section F4


Wave on Loop


Wave on Loop Demo Picture

Wave on Loop Demo Picture 2

  • This demonstration has been used to explain how sound can
    be used to break a wine glass, or to help illustrate principles behind the
    Bohr model of the hydrogen atom.
  • There are two configurations of loops from which to choose:
    parallel to the floor or perpendicular to the floor.
  • When changing accessories to the oscillator be careful to
    lock the piston (as the oscillator is quite delicate).

Location

  • Mechanical oscillator, wire loop, and
    function generator located in L02, section C2, in “Chladni plates”
    box.

Ripple Tank


Ripple Tank Demo Picture
Ripple Tank Demo Picture 2

  • Study wave phenomena such as reflection, refraction, diffraction,
    and interference.
  • Strobe attachment allows demonstrator to “slow down”
    waves. Projection mirror and screen can be used for classroom visibility.
  • Ripple tank and accessories located in L02, section C2.


Chladni Plates


Chlandi Plates Demo Picture

  • Determine resonant frequencies of square and circular plates,
    and circular hoop. Examine modes of vibration at any frequency. Sand collects
    along the nodal lines of wave patterns, revealing clear and beautiful pictures
    of various modes of vibration. This one is a crowd pleaser.
  • Located in L02, section C2.


Partial Transmission


Partial Transmission Demo Picture

  • Waves propagate down Shive wave apparatus at a rate that depends on rod length. Connect two different Shive wave apparatuses together- one with short rods, the other long. Due to a difference in wave propagation speed partial reflection and transmission occurs at their interface.
  • Use small binder clips to attach apparatuses together.
  • Located in L02, section B2.


Pendulum Wave


Pendulum Wave Demo Picture

  • Aesthetic demonstration based on relationship between period and arm length.
  • Use wooden slat to start pendula in unison with equivalent
    amplitudes. As pendula cycle through all possible phase relationships, a variety
    of wave patterns emerge.
  • Located in L02, section C-1.
  • see: https://www.youtube.com/watch?v=yVkdfJ9PkRQ


Driven Oscillator


Driven Oscillator Demo Picture

When the sine wave generator is tuned to the right freequency ( the natural frequency of the mass-spring system) the mass oscillates with very large amplitude. When generator is not tuned to the natural frequency of the spring (even if off by .1 Hz), oscillation amplitude is very small.

Location

  • Pasco Sine Wave Generator and Driver: L35, section C3
  • Masses: L35, section D1
  • Ring Stand: L35, section A
  • Spring: L35, section C2


Boil Water with Vacuum


Boil Water with Vacuum Demo Picture Boil Water with Vacuum Demo Picture 2 Boil Water with Vacuum Demo Picture 3

  • Evacuate chamber with vacuum pump and water boils.
  • Explanation: Room temperature water contains enough energy to boil but won’t because atmospheric pressure pushes in on the liquid from all sides, preventing vapor bubbles from forming.Remove pressure and water will boil.
  • Demo located in L02, section C-3.


Jamming


Jamming Demo Picture Jamming Demo Picture 2

  • Two ends of a rope are inserted into a cup of loose sand. When pulled up, the rope easily slips out of the sand. If, however, the bottom of the sand-filled cup receives a few tamps from a solid surface (like a table top) the cup can be lifted by the rope.
  • Located in L02, Section B-3.


Terminal Velocity


Terminal Velocity Demo Picture

  • Demonstrate how terminal velocity depends on mass and surface area.
  • Stack coffee filters together to increase mass. Race coffee filter with cupcake wrapper to show dependence on surface area.
  • Located in L02; section D1.


Kubic Bubbles


Kubic Bubbles Demo Picture

  • Build cubes, octahedrons, tetrahedrons and triangular prisms – then
    dip them in soapy glycerin mixture to produce surfaces of minimum energy.
  • Study surface tension and demonstrate light refraction.
  • Soap film surface contained by three dimensional framework will
    automatically arrange itself to have the smallest possible surface
    area. Soap films can be used to give visual answers to complex mathematical problems.
  • Located in L02, section D1. Soap solution located in L01,
    section B5.


Franklin’s Flask


Franklins Flask Demo Picture

  • Demonstrate Boiling at a Reduced Temperature and Pressure.
    Initially, the flask should be in a normal upright position and partially
    filled with water. After bringing the water to a boil, close off the neck
    with a rubber stopper fitted with a thermometer and invert the flask. Place
    ice in the concave bottom. Water should start to boil again, and continue
    to boil until it is only 15° or 20° above room temperature.
  • Located in L02, section C3.


Magdeburg Plates


Magdeburg Plates Demo Picture Magdeburg Plates Demo Picture 2 Magdeburg Plates Demo Picture 3

  • Place circular plates in contact with each other; evacuate
    air using syringe; attempt to pull plates apart.
  • Using transparent cylinder and circular plate, evacuate air
    to boil water, inflate balloon, or un-stick a suction cup.
  • Located in L02, section C3.


Levitron


Levitron Demo Picture

Tricks to making it work

  • Put just enough weight on the top so that it doesn’t lift
    off the pad while raising top to levitation height; too much weight causes
    top to drop back down.
  • After attempting to level the base, take a few test runs
    and observe the tops tendencies. If top tends to fly off on one particular
    side, raise the base on that side by twisting corresponding leg.
  • Many people can’t spin a top- use electric top spinner.


Turntable


Turntable Demo Picture

  • Used in uniform circular motion lab, coefficient of static
    friction is calculated and then used to predict maximum rpm at which car will
    remain on table.
  • Adjust rpm with 5 amp, regulated DC power supply.

Location

  • Turntable and car in L02, section B4.
  • Power supply in L35, section F1.


Center of Percussion


Center of Percussion Demo Picture

  • Tap hanging meter stick, with hammer, at various locations.
    Tap will cause meter stick to slide across parallel rods if tap occurs above
    or below center of percussion. If tap occurs at center of percussion
    the tap will not cause the meter stick to slide.(Meter stick will
    slide do to swinging motion, however.)
  • Ring stands, clamps, and meter sticks located in L34


Bike Wheel Gyro

Bike Wheel Gyro Demo Picture

  • Clutch mechanism allows demonstrator to spin wheel just
    by rotating handle.
  • Use in conjunction with rotating stool for a nice (visceral)
    demo of conservation of angular momentum.
  • Located in L02, section D4


Rotating Stool


Rotating Stool Demo Picture

  • Use to demonstrate conservation of angular momentum, and
    to make your least favorite student sick.
  • Spin student with his or her arms extended; retraction of
    arms increases student’s angular velocity.
  • Located in L02, section D4.


Inertia Wands


Inertia Wands Demo Picture

  • Though wands have identical mass, one is much more difficult
    to handle.
  • Hold wand (meter stick) at 50 cm mark with one hand. Twist
    wand back and forth like a baton.
  • Located in L02, section D-3


Water Rocket

Water Rocket copy


  • Purpose: Illustrate how pressure and conservation of momentum
    are involved in rocketry.
  • Fill rocket 1/3 full with water; secure black, plastic cap
    as tightly as possible; insert needle into hole of cap; attach bike pump to
    needle; invert rocket and rest in pvc launch pad; pump up bottle being careful
    not to shake it or tip it over. 2-liter bottle much more effective than smaller
    bottle.
  • Please wear protective goggles!
  • Located in L02, section B5.


Rail Gun


Rail Gun Demo Picture

  • Demo is very reminiscent of Newton’s Cradle, but with one cool trick. Students expect that when one ball roles in, one ball roles out; and the final height of the outgoing ball is approximately equal to the starting height of the incoming ball .
  • However, one of the balls is highly magnetic (though identical in size and weight). This additional force causes the outgoing ball to shoot entirely off the track. See video at this link- http://www.arborsci.com/magnetic-accelerator.
  • Located in L02, section B-5


Transformation of Energy Balls

aka “Fire Balls” (Thank you, Frank)

Transformation of Energy Balls Demo Picture

  • Principle illustrated: Kinetic energy is transformed into
    heat during a collision.
  • Strike the balls sharply together with a sheet of paper in between
    balls. A hole, with charred edges, should appear in the paper, accompanied
    by a burning smell.
  • Location: L02


Coaster Track


Coaster Track Demo Picture
Coaster Track Demo Picture 2

  • Purpose: Nice for illustrating gravitational potential energy
    problems.
  • Use ring stands and duct tape to set up.
  • Two different coaster tracks are on the shelf. One of them
    is more flexible and easier to use.
  • Located in L02, section B2